In order to use Google’s advanced map services together with our Map Widget (or for other projects) on your website, you have to create a free account with Google Maps since 2018. You can then create an API key that you can easily integrate in our Map Widget to use the Google map features on your website or blog. Currently more than 25,000 API calls per month are free of charge (please check the current Google map pricing).
Step 1: Create your Google API Key
- Go to the developer page of Google Maps.
- Log in to Google with your account information or create a Google Account
- Click on the button at the top right
- Now assign a name for your project, e.g. myLike Maps and confirm the Google Terms of Service
- If you are using the Google service for the first time, you will be asked to create a billing account (a high volume of access is free)
- Fill in the billing information (credit card) and confirm your account
- In the next window, activate the Google Maps platform by checking the ‘MAPS”‘ product
- Confirm the activation of the APIs by clicking on
- Copy the displayed key and then click on (it will also be sent to you as an e-mail)
- Via Google Dashboard you can access all settings of your Google Account and created API keys at any tim
Step 2: Add your Google API Key to myLike
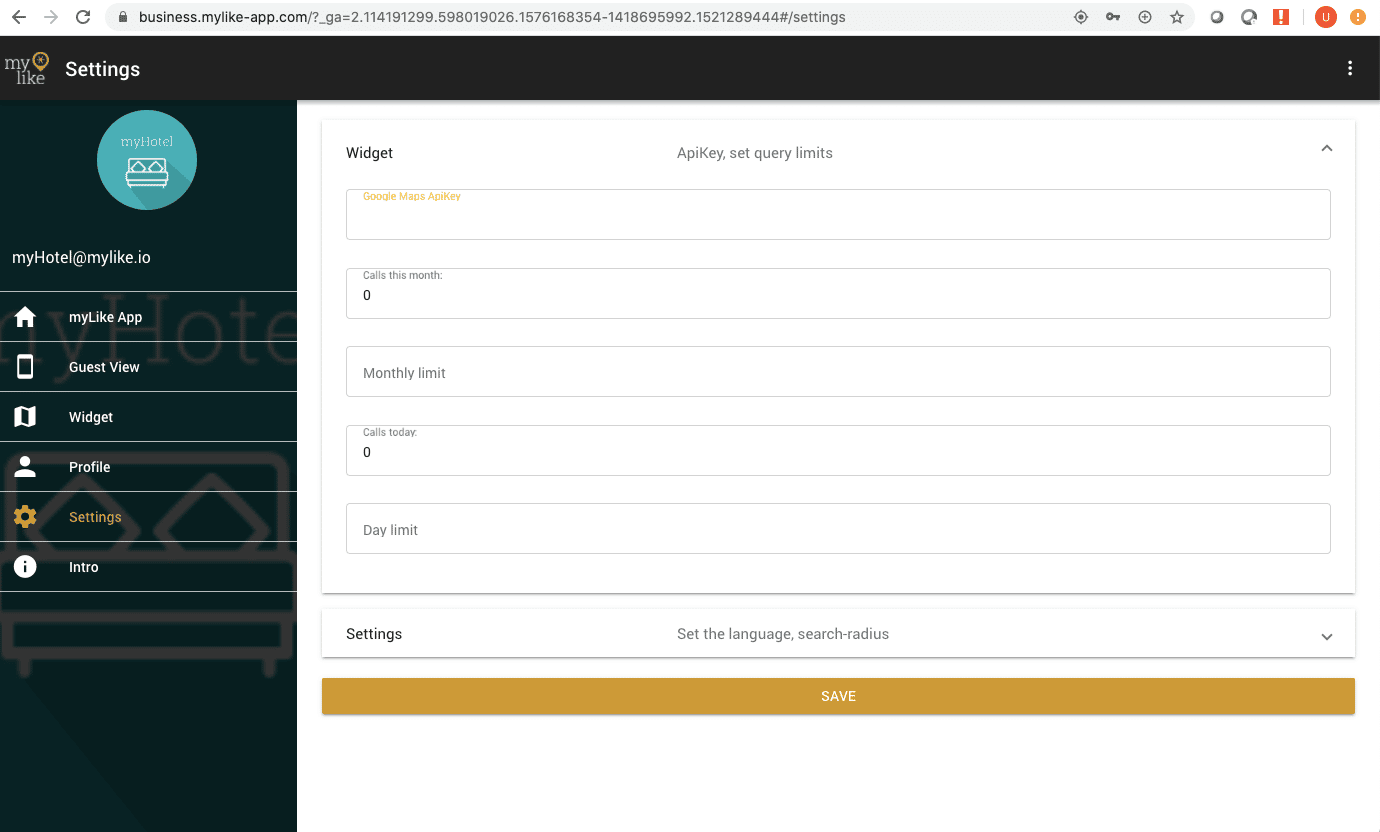
- Open the myLike Dashboard
- Select <Settings> from the menu on the left
- Expand the ‘Widget’ field and insert your own API code in the uppermost field
- Below this field we show you how often your maps have already been accessed by your customers and you can set the maximum accesses per day or month. Alternatively, you can do this in the Google Dashboard (see below) if you use Google Services for other projects.
- Save your settings with the button at the bottom
Optional: Limit Google API costs
- Open the Google Dashboard
- Log in with your account when prompted
- Enter “MAPS JAVASCRIPT API” in the search field above and confirm the search
- Click on the right side ‘Contingents’
- Click then on the pen next to the entry “Map Loads per day” in the lower area
- Remove the check mark for “unlimited”
- Enter a target value and, if necessary, confirm the lower check mark “Reduction above 10%……”.
- Save this setting
