What is a tour – compared to a list
In myLike you can now easily create tours to
- use them for travel planning,
- save them as a memory for a great trip or
- share them with friends, followers or customers as inspiration.
The idea is that a tour
- sequentially represents successive places and – if you want – visually connects them by lines.
(Examples: if you are planning a trip through the USA and always want to have the sequence of the planned stations in mind, or if you want to show hotel guests a sequence of places that they can then start / approach as they like)
- a tour is presented as a detailed track and can show places that are on or next to the tour.
(Examples: a hop-on hop-off bus provider can digitally display its bus routes, stops and sights, passengers can track them on their smartphone and always know exactly where they are and what is waiting for them at the next stop. Bike or scooter rental companies can provide the most beautiful routes through the city to their customers. Jogging or hiking paths can be offered by hotels to guests on the go)

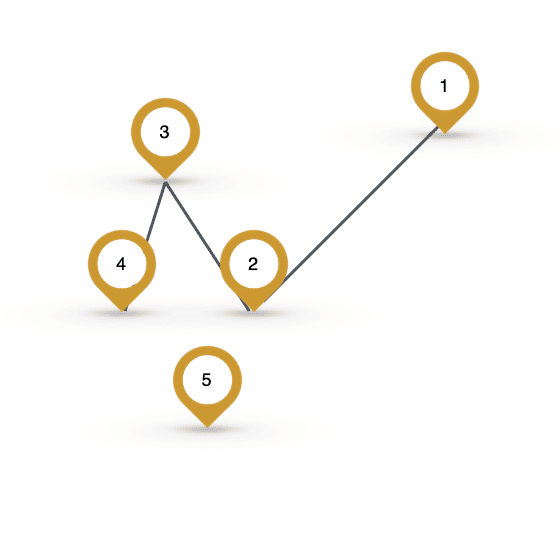
tour without lines
tour connected with lines
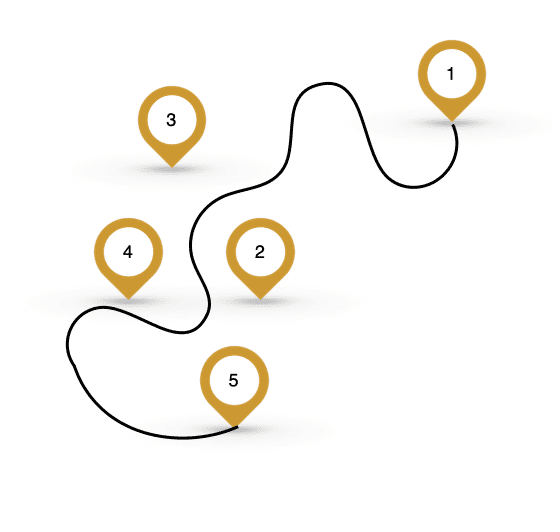
tour with GPS track
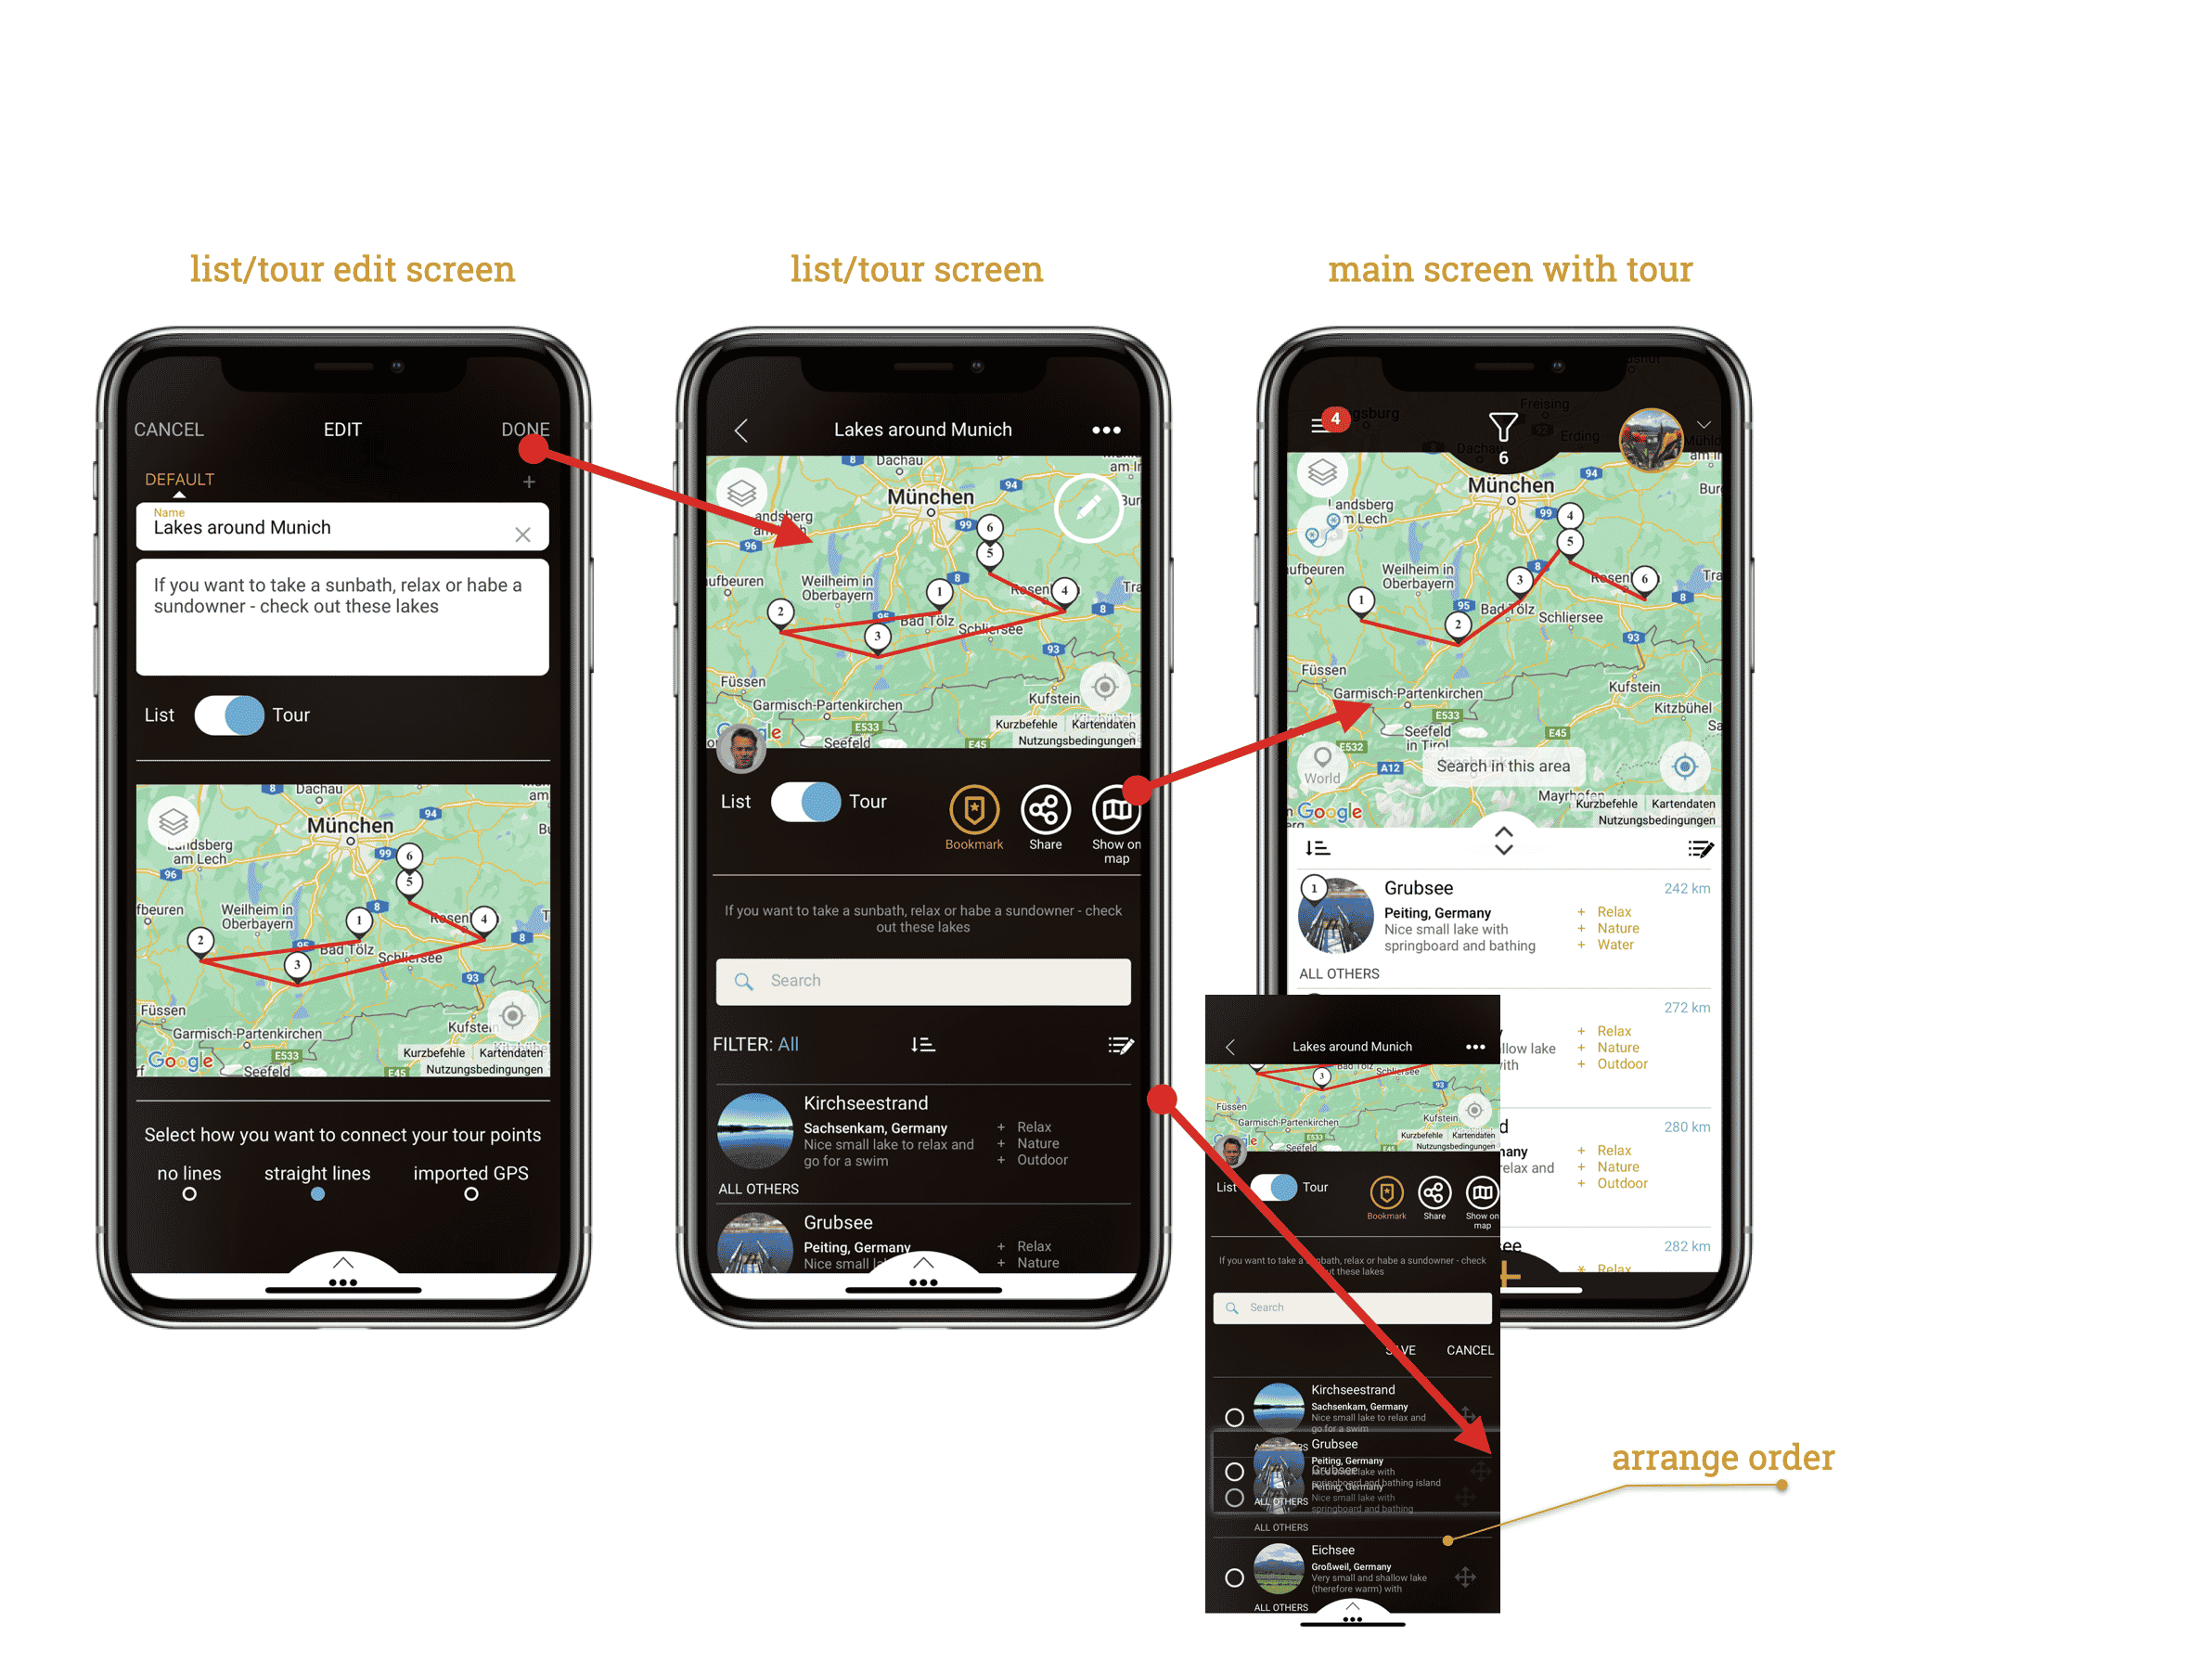
Create a new tour:
- Go to your profile <your avatar > from the main menu (left top corner)
- Click on <Lists/Tours>
- Click the <Add Tour> button
- There you land directly in the edit mode for your tour (you can switch between list and tour)
- Give the tour a name and a short description text
- Now define how you want to connect the points in your tour. The option you have chosen is displayed directly on the map:
- No line – but the places are numbered in the order as you defined in the list
- Straight lines – the individual tips are connected with straight lines in the sequence as you defined in the list
- GPS data – here you can add an existing route (GPX or KML file) to the places of your tour. Your tips do not necessarily have to be on the route, but can represent options (e.g. hotels, campsites, restaurants… along the tour). Here is a tutorial on how to easily create a KML file directly on Google Maps. Alternatively, download it directly as a GPX from your tracking tool and embed it in your tour.
Tipp: You can create from any POI (Point of interest) a new tour by just selecting add to <+List/Tour>. Instead of adding it to one of your existing lists or tours you find the option on the lower right to <Add Tour>.

- Define the visibility of your tour (private, friends, followers, everyone). You can change this at any time later again.
- Add an inspiring photo that visually represents your tour by pressing the <Add> button. You can change this at any time
- Press <Done>
- Now you can add points to your tour by opening it and pressing < list/tour> (you can also add multiple tips at once by going to a list, hid <edit list> which is the icon with the pencil on the top right of a list and select multiple places, then you tap <…> and select <add to list/tour>).
- If you hit <show on map> you can have a look how it appears on the main map
- You can change the order of the tips in the tour (and list) by clicking on the <edit List/Tour> (this is the icon with the pen and the lines on the right above the list entries) and moving the entries with the arrows – then press <Save>.