How to create tours in myLike
With myLike, you can easily create tours and share them directly with your customers, guests, audience and friends.
You have two main options:
Option 1. Show places in a sequence:
- Present locations one after another in a clear order.
- Optionally connect them with lines to highlight the route visually.
Examples:
– A road trip across the USA with all planned stops in the right order.
– A sightseeing tour that shows guests a sequence of great places they can explore at their own pace.
Option 2. Show tour as detailed GPS track:
- Display full routes, including points of interest along or off the path.
- Users can always see exactly where they are on the tour.
Examples:
– Hop-on hop-off bus operators can show their routes, stops, and attractions as detailed routes – passengers always know where they are and what highlights awaits them at the next stops. myLike can even show the live position of the buses along the tour.
– Bike or scooter rental companies can highlight the most beautiful routes through the city.
– Hotels can provide jogging, cycling, or hiking trails for their guests.

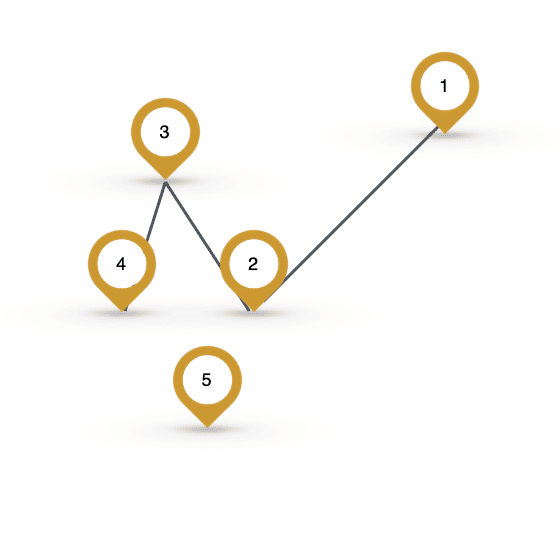
tour without lines
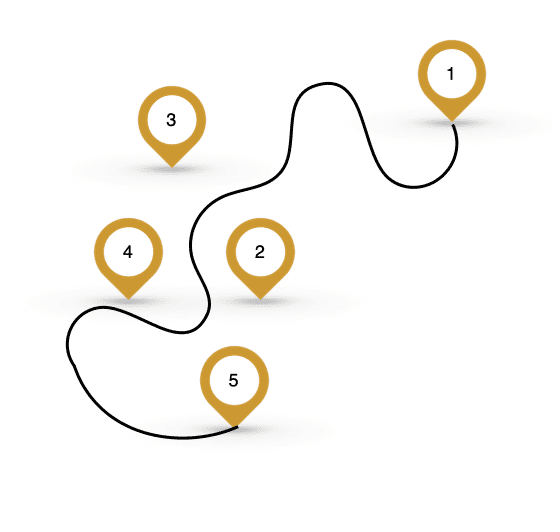
tour connected with lines
tour with GPS track
Create a new tour:
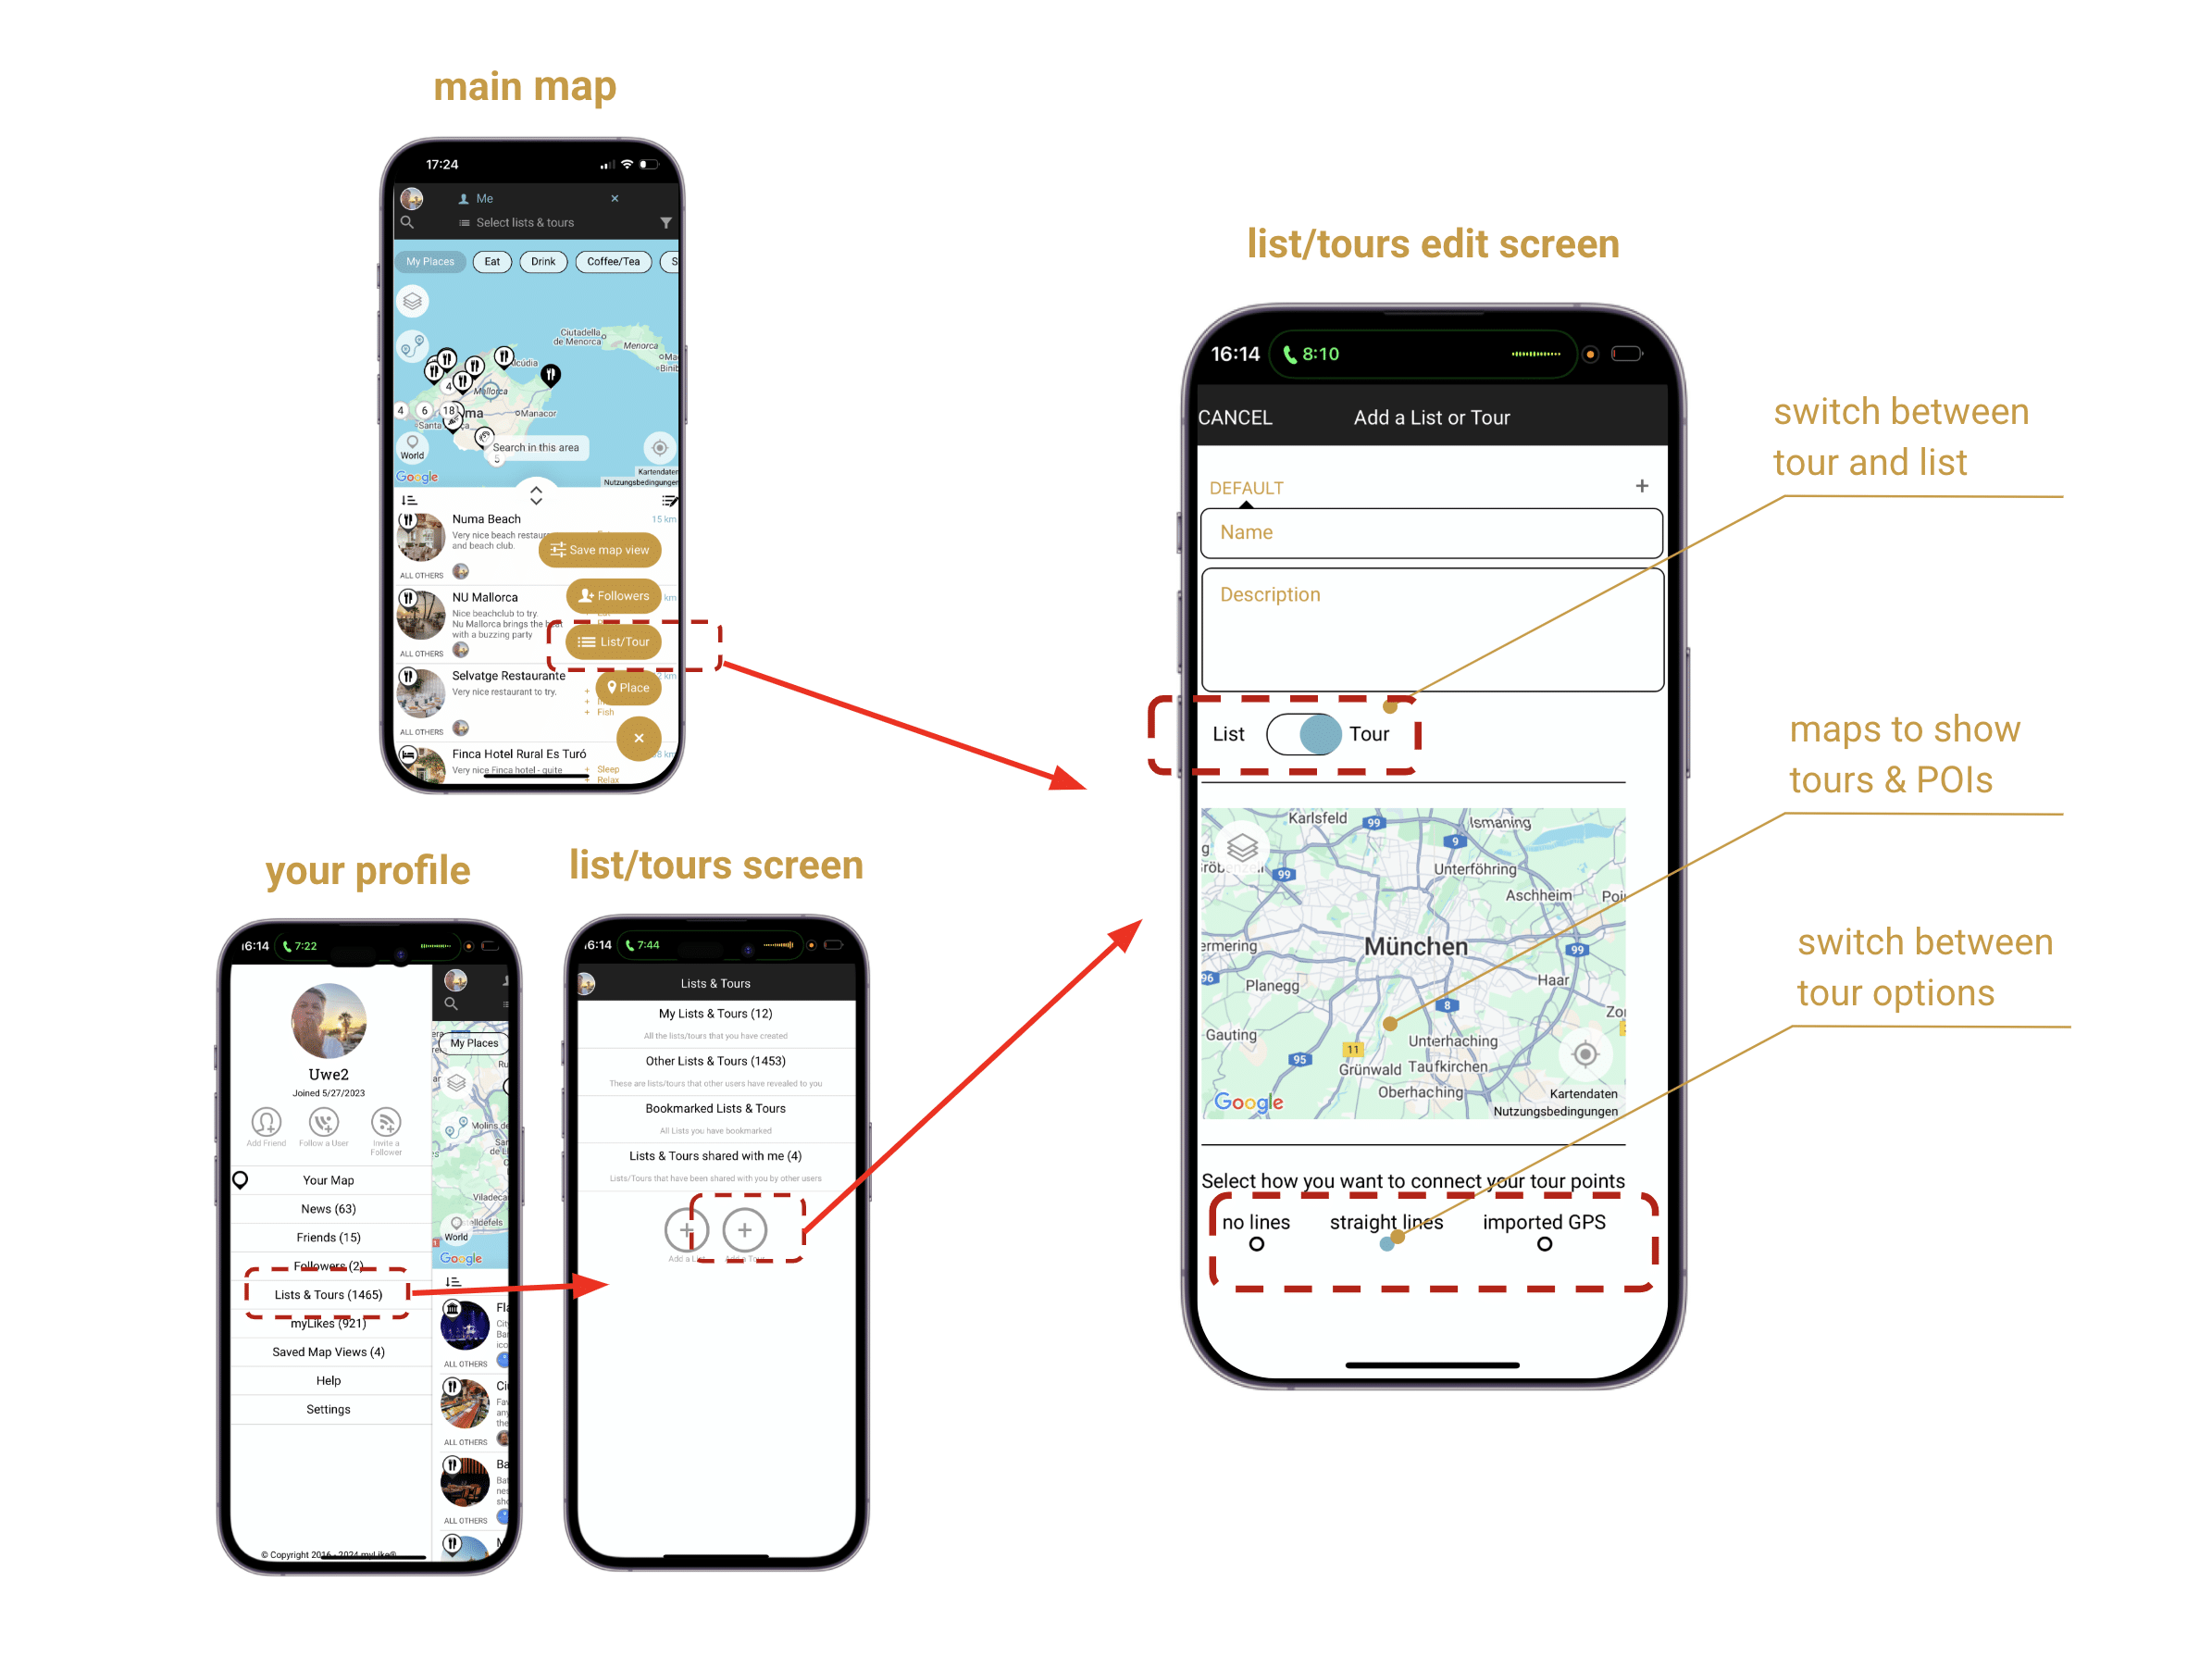
- Go to the <+> from the map screen (or go from your profile to your <lists/tours>).
- Click on <+List/Tour> which leads you directly to the edit mode for your tour.
- Switch on <Tour>.
- Give the tour a name and a description text (length, altitude, what is covers…).
- Define the visibility of your tour (you, everyone). You can change this at any time later again
- Add an inspiring photo that visually represents your tour by pressing the <Add> button at the bottom of the window. You can change this at any time.
- Now define how you want to connect the points in your tour. (The option you have chosen is displayed directly on the map above):
-
- no lines: there will be no no connecting lines but the places are numbered in the order as you defined it in the list (which you can change any time – see below).
- connected lines: the individual POIs are connected with straight lines in the sequence as you defined it in the list (which you can change any time – see below).
- uploaded GPS: here you can add multiple GPX or KML files to your tour and as many POIs as you want, right on or besides the route.
Tip: You can directly create a new tour from any POI (Point Of Interest) by just selecting <+List/Tour>. Instead of adding it to one of your existing lists or tours, you find the option on the lower right to create a new tour.
Straight Line/No Line Tour:
- When you select the straight line option the POIs will be connected with straight lines on the map in the sequence as they appear in the tour-list (top to bottom). If you select the no line option POIs will be marked in sequence but without lines connecting them.
- Now you can add POIs to your tour by opening it individually and pressing <+ List/Tour>. Yuo can also add multiple POIs at once by going to a list or the main map, then click on the icon with the <pen> on the top right of a list, then select the places you want to copy to the tour. Then you tap <…> and select <add to list/tour>).
(Tip: you can also convert an existing list to a tour by just switching the button) - If you hit <Show On Map> you can have a look how it appears on the main map
- You can change the order of the tips in the tour (and list) by clicking on the <edit List/Tour> icon (this is the icon with the pen and the lines on the right above the list entries) and moving the entries with the shaded squares – then press <Save>.

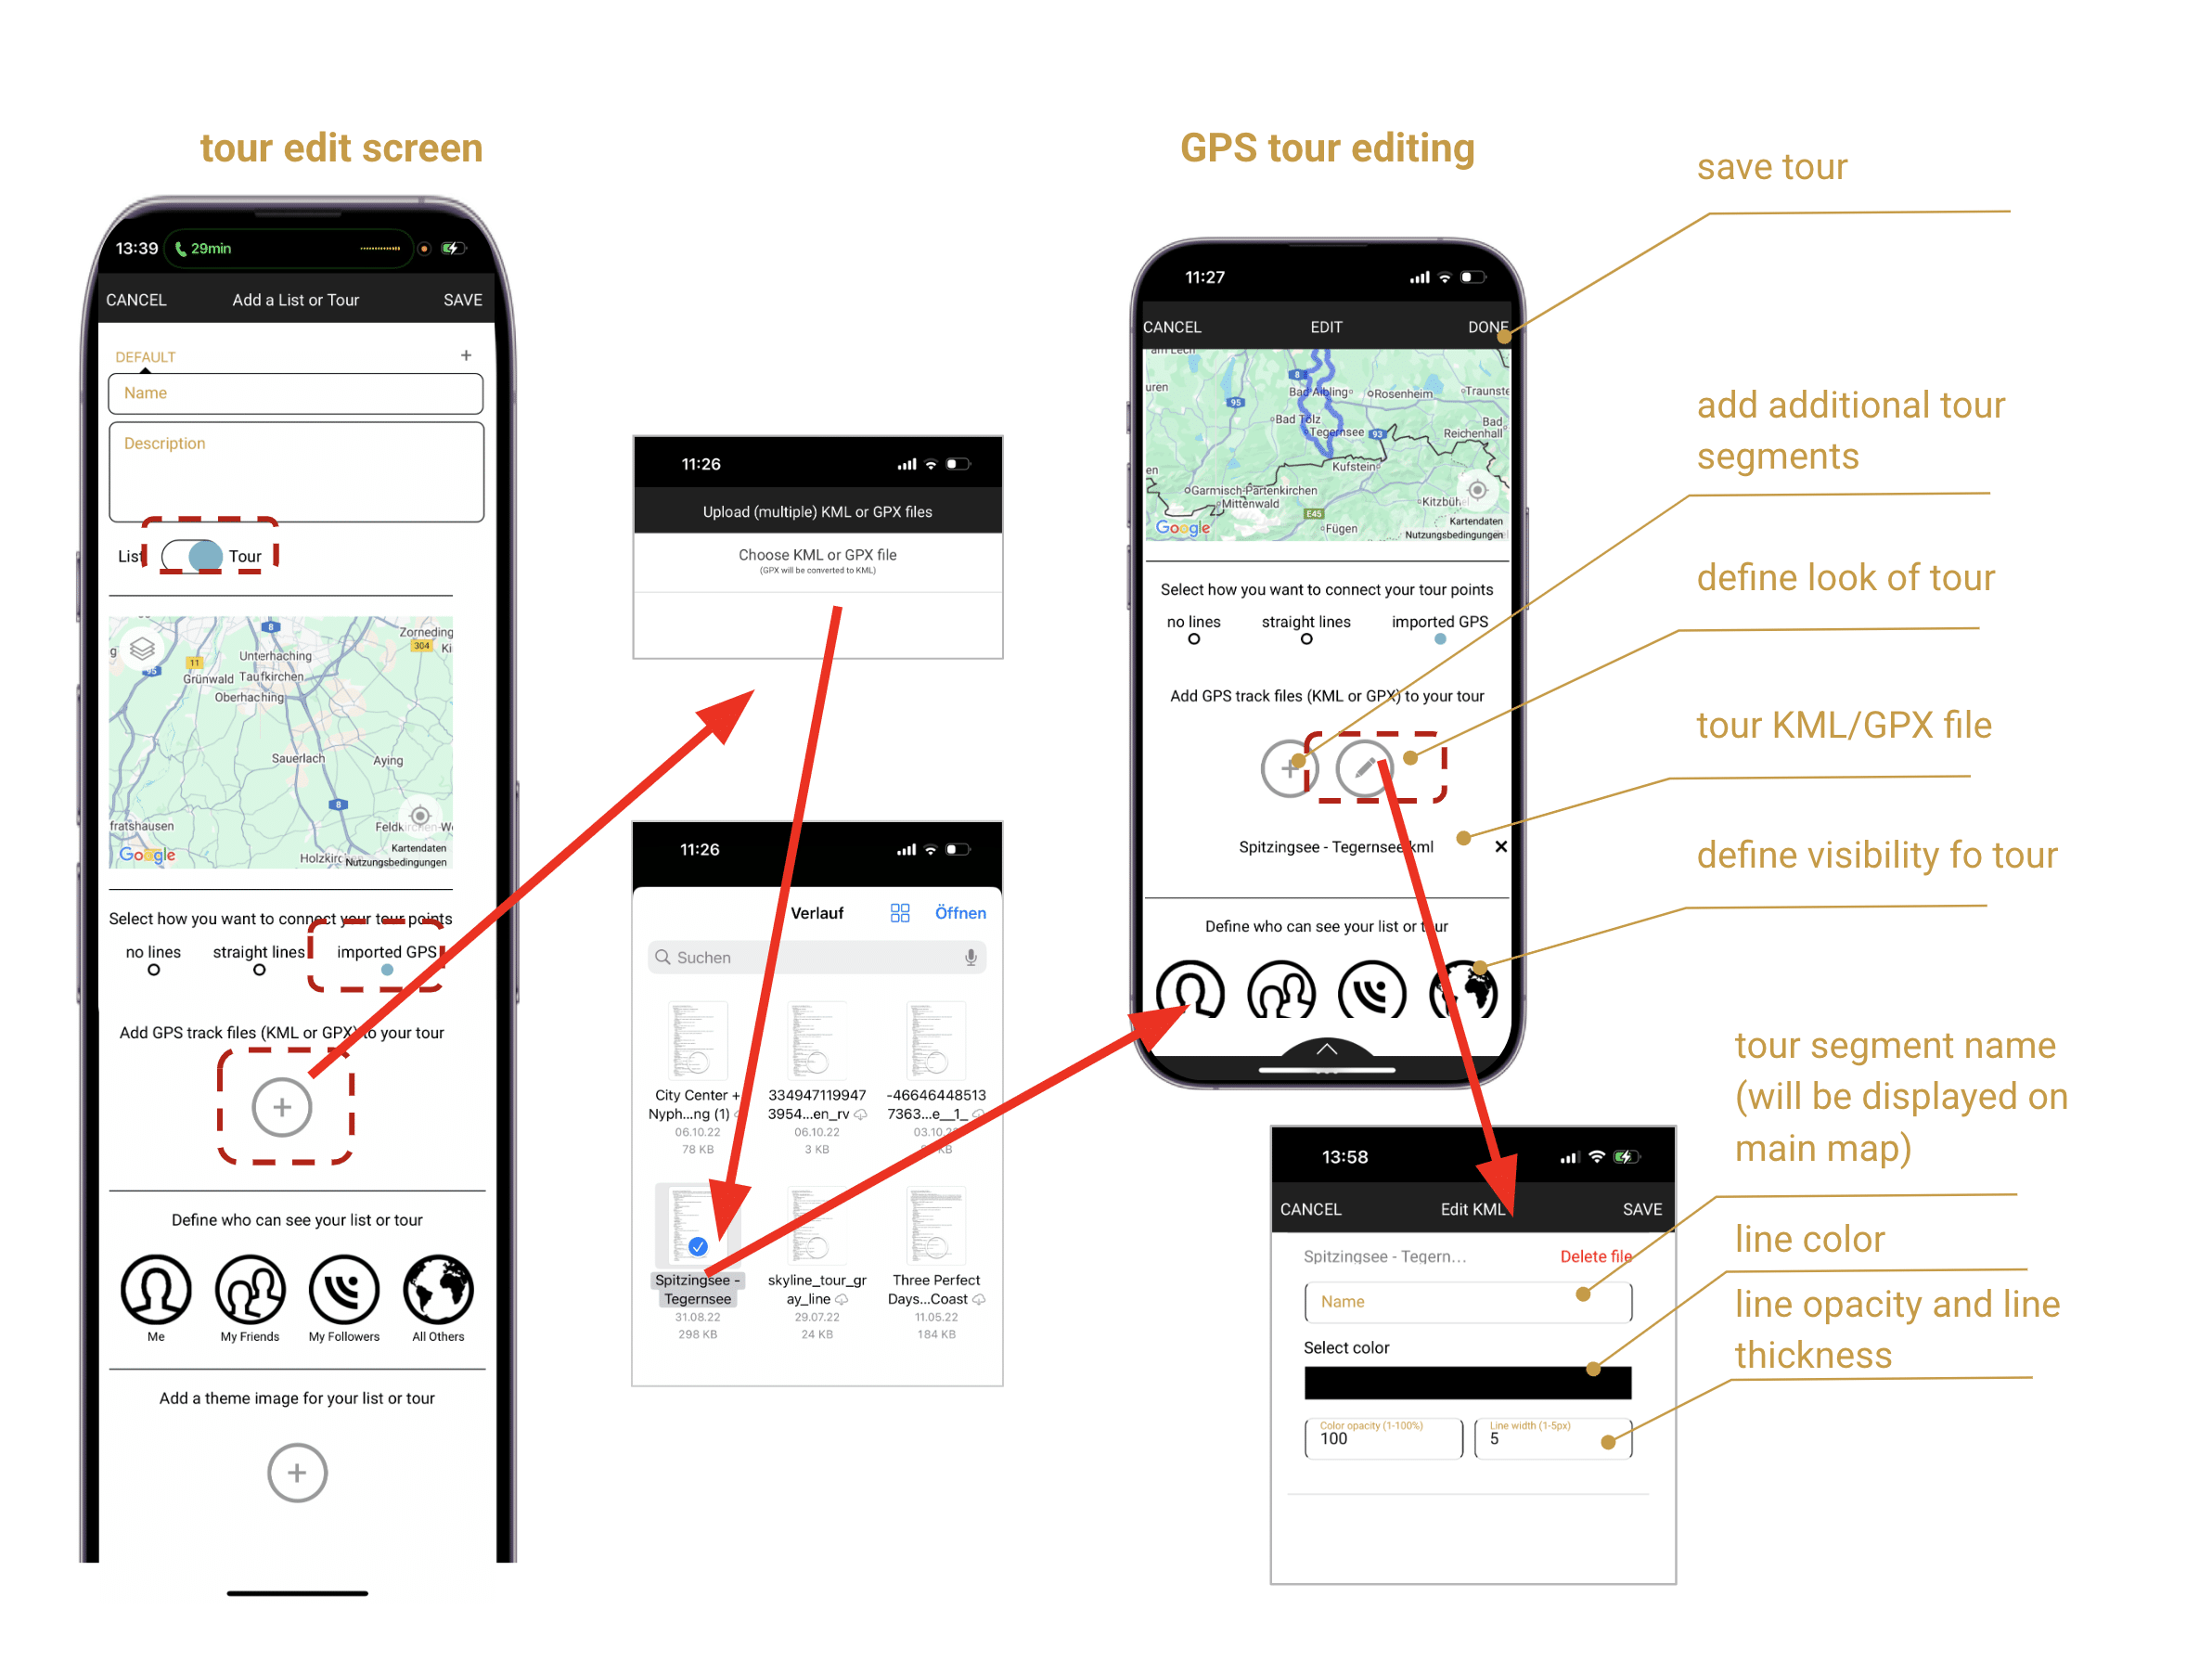
GPS Tour with and without POIs:
- You can add multiple GPS tracks to a tour to show a very detailed routing. You can then also add as many POIs as you want.
- After selecting uploaded GPS you click on the <+> which allows you to upload a GPX or KML file (GPX will be converted into KML). You can add as many files as you want to a tour – for example if it is split into multiple segments (each can have a different color and name).
- The uploaded tour will then be visible on the map.
- Now you can define its color, thickness, and opacity by clicking on the icon. You can give it also a name which will be displayed when a user clicks on the route on the main map.
- You can give the tour an Icon picture by going to the bottom and <Add> a photo.
(Tip: you can take a screenshot of the main map displaying the tour – and add it as a tour icon) - If you hit <Show On Map> you can take a look at how it appears on the main map.
- Now you can add POIs to your tour by opening it each POI individually and pressing <+ List/Tour>. You can also add multiple POIs at once by going to any list or the main map, then click on the icon with the <pen> on the top right of a list, then select the places you want to copy to the tour. Then you tap <…> and select <add to list/tour>).
(Tip: you can also convert an existing list to a tour by just switching the <list/tour> button to tour)